Spring cleaning is typically the perfect time to sweep out the garage, reorganize the linen closet and wipe down the windows. But in Spring 2020, our cleaning goals are slightly different.
While shelter-in-place orders around the country may be giving families plenty of time to tackle those Marie Kondo-inspired tidying-up projects, these guidelines are essential to slow the spread of the novel coronavirus.
Here are some helpful cleaning strategies that may help you keep germs at bay, even if your family is in good health:
Protect Yourself
Remember to wear disposable gloves when you’re cleaning, and wash your hands before and after to help minimize the spread of germs. It’s also best to work in a well-ventilated space, as disinfecting chemicals can be very strong. Also, never mix cleaning chemicals as this can create toxic off gassing.
Clean First, Then Disinfect
The CDC explains that cleaning and disinfecting are two different things. Cleaning helps remove dirt, debris and other residue, whereas disinfecting helps kill bacteria and pathogens.
First, wipe down surfaces with a cleaning towel or soap and water to remove dirt. Then follow up by using an EPA-approved disinfectant or a diluted household bleach solution containing 4 teaspoons of unexpired bleach for each quart of water.
Your disinfectant will need to remain on the surface for a certain amount of time, so follow the manufacturer’s instructions. For a household solution, wait at least 1 minute.
Focus on High-Touch Surfaces
The CDC also recommends cleaning high-touch surfaces in high-traffic areas. These include bathroom and kitchen surfaces, faucets, doorknobs, hard-backed chairs, lightswitches, game controllers, computer keyboards and mobile devices.
Explore Cleaning Guides from HomeServe
If you’re like me and have become somewhat obsessive about keeping your house clean and wanting to try to keep the coronavirus at bay, check out the following HomeServe blogs for general cleaning tips and tricks that may help with hard-to-clean spots and surfaces.
Don’t forget to bookmark this post so you can come back to these helpful hints when next year’s Spring cleaning season comes around.
Cleaning Products to Use Around the House
How to use a Mr. Clean Magic Eraser.
How to clean with baking soda.
How to clean with only coffee.
How to clean around the house with Coca-Cola.
How to clean with eco-friendly products.
Bathroom Cleaning Guides
How to clean a shower head.
How to clean shower doors.
How to clean tile grout.
How to get rid of mold.
Kitchen Cleaning Guides
How to disinfect sponges in the microwave.
How to clean your kitchen and fend off ant invasions.
How to clean out a clogged kitchen sink.
How to clean stainless steel appliances.
How to clean an electric stovetop.
How to clean your oven.
How to clean out a microwave.
How to clean a dishwasher.
Living Space Cleaning Guides
How to clean an air conditioner.
How to clean laundry machines.
How to clean hardwood floors.
How to clean lighting fixtures.
How to clean your thermostat.
Prepare for the Unexpected With a Home Repair Plans
As you and your family follow shelter-in-place orders and spend more time at home, you’re counting on your essential home systems to stay in working order. Now, more than ever, your home is playing a major role as your living space, office, schoolhouse, play zone, fitness center and more. An unexpected home system breakdown could have consequences for all of these aspects of your life.
Being prepared for the unexpected with a repair plan from Service Lines Warranties of America is a good strategy.
A few months ago, I wrote about my water heater mishap. (I know I’ll never forget that feeling of a freezing cold shower). I’m glad to report that my new water heater is still providing our family with hot showers and clean laundry – but I’m always on the lookout for the signs it might need maintenance.
During the frigid winter months, it’s more important than ever to check in on your water heater. If you do catch a problem early on, or realize you need an entirely new system, you can be proactive in receiving repairs (and won’t be caught in a mid-shower frozen surprise).
From my experience, I learned that installing a water heater is half the battle – and the majority of the cost – of purchasing this essential system. Don’t settle for lukewarm showers and half-washed dishes. Here’s everything you need to know about the cost to install a water heater.
The tank vs. tankless debate
The fact of the matter is, installation costs depend on the type of water heater you need or already have. Home Depot breaks down two of the most popular choices for homeowners:
Traditional water heaters: Typically store between 20 and 80 gallons of water heated by gas or electric power. The average total cost for a new traditional water heater and installation is $1,308.
Tankless water heaters: Gaining popularity in recent years, these units are also fueled by gas or electricity but only heat water as needed. They’re accepted as being more environmentally friendly, though they come with higher upfront costs. The average total cost for a tankless water heater is around $3,000.
Total costs include everything from the unit itself, permits, materials, installation, labor costs and removal of the old unit. Thumbtack.com estimates the national average cost of installing a water heater ranges from $500 to $1,000.
What’s your fuel source?
Water heater installation costs aren’t just affected by the type of water heater chosen, but also by the fuel sources available. Both traditional and tankless heaters can use gas or electricity to warm up water. A gas water heater may cost $50-100 more to install than an electric tank water heater. Likewise, you can expect to pay $500 more for a gas tankless water heater than an electric water heater.
If you need – or want – to switch fuel sources, you’ll most likely need to add some room to your budget. Going from an electric to gas water heater may require the addition of a gas line, that usually costs $500 to install, reports Homewyse.com.
Other factors to consider
The size, model, home layout and any additional – necessary – work can all contribute to the costs associated with installing a water heater. Traditional water heaters may require expansion tanks to minimize the risk of pressure damage to the plumbing system. TheSpruce.com explains this is mostly needed in closed water supply systems, so always factor that into your water heater costs.
While tankless heaters come with higher upfront costs, they can require less maintenance in the long run and families can see energy costs decrease because water is heated on a need-only basis. Both kinds of water heaters have energy-efficient models available for more cost savings.
Though each system comes with its own unique costs, installation can also vary based on your needs and wants. Always make sure to do your research before deciding on the best water heater for your home and have a licensed professional install it.
See how plans from Service Lines Warranties of America can help with the costs of home repairs.
Remember that episode from Season 5 of “Friends” entitled “The One With Ross’ Sandwich” where Ross has an actual breakdown after someone steals his Thanksgiving leftovers? (One of my all time faves!)
Apparently, Ross had been looking forward to that Thanksgiving sandwich all year long – ‘cause it’s just that good.
While you binge on Netflix after the parade and pumpkin pie, wondering what to do with all those Thanksgiving leftovers, why not bookmark a few of my favorite post-Thanksgiving recipes?
My kids say these are better than Thursday’s turkey and stuffing — but I’ll leave it to you and yours to decide.
Breakfast
Try these low-carb stuffing waffles with a dollop of cranberry sauce. Or start your morning with Thanks Benedict, featuring stuffing cakes smothered in a sage hollandaise sauce, by one of my favorite chefs, Giada de Laurentiis.
For a weekend brunch with friends (and mimosas), I love making a sweet potato and kale frittata with creamy goat cheese, or this stuffing and turkey quiche.
The kids will adore breakfast sausage and stuffing bites — they’re so good you’ll want to pop a few before heading out for the Black Friday doorbusters.
Get a plan from Service Lines Warranties of America today
Soups and sandwiches
My favorite turkey soup is a creamy, one-pot recipe for turkey and dumplings. It’s a great way to use up whatever turkey meat and veggies you have left.
I also recommend this hearty leftover turkey chili recipe. With a bowl filled with leftover goodness plus edamame and a homemade spice mix, it’s a great way to help your taste buds (and waist line) transition out of the holiday weekend.
And, while you can easily throw together a turkey sandwich to relive the flavors of Thanksgiving Day, why not take it up a notch with a gooey brie, apple and cranberry grilled cheese sandwich? Simple but oh-so indulgent.
Savory pies
If you’re in the mood for comfort food, don’t miss this Thanksgiving shepherd’s pie. Or, remix the same festive flavors into a turkey pie with a cornbread stuffing crust.
I also can’t speak highly enough of Paul Hollywood’s ham and turkey pot pie. As seen on the Great BritishBaking Show holiday masterclass, it features a creamy sauce with leeks simmering beneath rough-puff pastry and looks as impressive as it tastes.
Get a plan from Service Lines Warranties of America today
For something quicker, pop these easy Thanksgiving leftover hand pies into the oven. They’re made with store-bought pie crust and the kids will enjoy crafting their own homemade hot pockets.
Pizza
Leftover pizzas are a serious crowd-pleaser! Layer up turkey and sides into a Thanksgiving pizza baked in puff pastry. This version is topped with fried onions for an extra crunch.
My kids always request this yummy mashed potato pizza with leeks and bacon crumbles, but I also like to make up another pizza with turkey, cranberries and barbeque sauce for the grown-ups.
Before you get busy using all your appliances in the kitchen, it’s a good idea to have an appliance home warranty plan in place – just in case there’s a breakdown. See how plans from Service Lines Warranties of America can help with the costs of home repairs.
Low or declining shower pressure may be a frustrating situation. Fortunately, most of the causes of low shower pressure can be fixed quickly, easily and without a lot of personal expertise.
To determine the culprit behind this issue, there are a number of places to look. The best place to start is in the shower itself.
Here are some DIY shower pressure fixes you can complete without the assistance of a plumber:
Remove shower head sediment
Older homes may experience water pressure problems due to years of sediment build-up in the shower head.
You may be able to clean out an older shower head with a simple life hack: An eight-hour soak in vinegar. Inspect the shower head afterward to see if that fix solved the problem and clear any remaining debris manually. If you’re still experiencing low shower pressure, it’s probably time to buy a new shower head.
Adjust necessary valves
If you just moved into a new home, you might find the pressure isn’t to your liking because the builder or previous owner installed a low-flow shower head. Try removing the flow regulator to improve the water stream.
If the problem persists, the low shower pressure may be the result of a water-restrictive shower valve instead of the shower head itself. Adjusting the central shut-off valve may increase the pressure.
Check with your water provider
For homes that get their water from municipal sources, there may be a problem with the amount of water flowing into the property as a whole.
You can increase the flow of water into your home either from the curb-side main or via the one coming into the house. This should be done carefully, however, and may require a call to your water provider.
Look for leak
In some cases, valves themselves could be the source of the problem. If decades-old pipes start to leak, you’ll encounter reduced water pressure in not only the shower, but also throughout the whole home. However, those issues may only present themselves in the shower. If you have low water pressure in your home overall, you may have bigger issues to deal with, like an issue with your water service line.
If you discover any leaks in your home plumbing system, you can attempt to patch them up – if the pipes are relatively new – with little fuss. All you’ll need to do is shut off the water to that pipe, make sure it’s dry and apply either a tape- or epoxy-based sealant, available at most hardware stores, to the affected area of the pipe. Some patches may not be advisable for lines that supply drinking or shower water, so check the packaging to make sure you get the right one.
When You Might Need to Call a Professional
As we have discussed, many low shower-pressure issues can be fixed on your own with a quick trip to the local hardware store to buy a replacement shower head or valve, and a few DIY how-to videos.
Once you have completed these repairs by yourself, it’s a good idea to plan for the future. Should you have any future problems, having a home warranty for your interior plumbing and draining system is a good idea.
See how plans from Service Lines Warranties of American can help with the costs of home repairs.
Not sure if you need the help of a professional plumber? If the issue falls under one of these scenarios, you should definitely call a professional for expert help.
When the water pressure is low
If the water in your home isn’t flowing at its normal pressure, there could be a blockage or leak in the system, fractured pipe or eroded waterline. It can be difficult for the typical homeowner to pinpoint an issue like this. A plumbing professional can identify the source of low water pressure and advise on appropriate solutions.
When there’s no hot water
If your water isn’t heating up efficiently, it’s likely a water heater problem. As these units run on electric or gas systems, it can be dangerous to do repair work on your own. Similarly, if there is no water at all, call a professional to determine the cause.
When you notice severe pipe issues
If you think you have blocked, burst or frozen pipes, call a plumber immediately. Look out for signs, such as strange noises when the tap runs, sewage smells coming from faucets, lack of water or frost on exposed pipes.
Blockages are typically caused by sediment buildup or large debris in the sewer line. DIY attempts to fix these issues can cause more damage, resulting in a much larger repair bill. Even worse, a failed repair to a broken sewer line can cause issues for an entire neighborhood.
When you hear concerning noises
If you hear an extremely loud noise coming from the pipes, it may be a sign that something in the system is broken or about to break. If you hear a gurgling sound coming from the drains or pipes, it can be a sign of a clogged or compromised plumbing system. The sounds will likely appear when you’re using the toilet, shower, washing machine or dishwasher. If you hear these sounds, turn off the water immediately. This step will prevent the system from backing up into the house until the plumber arrives to inspect the issue.
When you’re doing a home renovation project
If you’re renovating the bathroom, kitchen, laundry room or other areas of the house that involve plumbing, make sure you get professional advice before starting the project. Relocating or installing plumbing-related items, such as sinks or dishwashers, requires the correct placement of supply lines and drains. A plumber can tell you if your renovation plans are feasible and ensure you have the proper permits. With that advice, you could save money on a potential repair or re-installation.
When you notice water damage
Look out for signs of water damage, such as leaks, water stains and mold growth. It’s ideal to catch water damage before the mold growth gets too severe, as the fungus is a health and safety hazard. A plumber can determine the source of the moisture and perform appropriate repairs to prevent further mold growth.
When DIY solutions aren’t enough
There are easy DIY fixes to many common plumbing issues, such as leaky faucets or clogged drains. Keep these plumbing do’s and don’ts in mind if you are attempting to repair the issue on your own. However, if the problem persists even after you’ve tried to fix it, a more serious problem may require expert plumbing knowledge to repair.
If you’re uncomfortable performing DIY plumbing, never hesitate to call a professional – even if it’s for a simple fix. A mistake could lead to a more severe issue, so it’s better to save yourself the hassle and get it fixed properly the first time around.Being prepared before home maintenance issues arise is always a good strategy.
See how plans from Service Lines Warranties of American can help with the costs of home repairs.
If you’re ready to put your handyman skills and toolbox to use, a toilet installation is a relatively simple job to start stretching your DIY muscles. Here are some tips you need to know about installing a toilet on your own.
Reasons to take on the project:
Replace or upgrade an old toilet
Remove and replace during remodeling
Save water and energy
If your toilet troubles are persistent, such as excessive clogging or cracking porcelain, the best option is to replace it. You can save money on your water bills by upgrading your unit to a low-flushing, energy-efficient model. According to the Environmental Protection Agency, toilets are responsible for 30 percent of a home’s average indoor water consumption. Look for the EPA’s WaterSense label for high-performing, water-efficient models. Be sure to measure your bathroom before purchasing so the new toilet will fit in your space.
How to remove the old toilet:
Keep your safety in mind, and try to avoid breaking the toilet as a way to remove it. Plus, if it isn’t in terrible condition, you can sell or donate the unit.
Here’s how to dismantle the toilet without breaking it:
Turn off the water supply. The valve is on wall or floor behind the toilet.
Drain all the water from the bowl. Start by flushing the toilet, then use a plunger, small cup or sponge to remove any excess water.
Disconnect the supply line. Use a wrench to carefully release it.
Remove the tank. Start with the lid, and then use a wrench to loosen the bolts at the bottom of the tank. Lift it straight up, but gently twist it side to side if you feel resistance.
Remove the bowl.Take off the bolt caps at the base of the toilet, then use pliers or a wrench to remove the bolts. Gently rock the bowl back and forth until you can pick it up entirely.
Clean the floor. Use a putty knife to remove any gunk from the floor and around the mounting flange. Wipe down the surface before installing the new toilet.
How to install a new toilet:
Just like removing the old one, you’ll install the new one in pieces. Make sure to read the manufacturer’s instructions for any specific guidelines.
Place the wax ringon the flange. Pro tip: Lowe’s recommended making sure the ring is warm before placing it, as it will be softer and easier to work with.
Set and secure the bowl. Place the toilet bowl onto the flange, aligning it with the bolt holes. Place a washer and nut on each bolt, and tighten into place. Alternate from side to side to make sure you tighten them evenly. Be cautious of over-tightening, as this can crack the porcelain. Place the bolt caps, and use a sealant around the base of the toilet to secure its position.
Install the tank. Follow the manufacturer’s instructions for placing the rubber gasket (if it’s not already installed.) Insert the mounting bolts through the inside of the tank, and then place it into position. Alternate tightening the bolts, like you did on the base.
Secure the toilet seat. Follow the manufacturer’s instructions.
Reconnect the water supply line. Turn the water back on, and then flush the toilet to test your work.
Not everyone is a DIY type, but if you are, it’s definitely worth a shot. If during the task you find yourself becoming increasingly frustrated, don’t hesitate to call in a professional. Serious plumbing issues can become a huge inconvenience, so it’s never a bad idea to have a certified plumber check out the problem.
See how plans from Service Lines Warranties of American can help with the costs of home repairs.
As a homeowner, you’re bound to deal with troublesome maintenance troubles. However, spotting problems early can help minimize the severity of the issues and protect your wallet from the burden of significant home repairs.
To catch and help avoid mold-related issues, here’s what you need to know about removing this common fungus from your home:
What is mold?
While it can be a nuisance inside your home, this fungus is a natural part of the environment. Mold can grow almost anywhere – on plants, food, wood, paper, carpet and tile grout – as long as there is moisture in the area. You’ve probably seen it darken the grout lines in your shower or build up on damp outdoor decks. The most common type of mold is mildew, which starts as little black spots and grows into a larger infestation. Black mold can be furry and possibly toxic, so homeowners should take extra precautions when trying to remove it. There’s also hidden mold, which you can usually smell even if you can’t see it.
Mold can occur at any time throughout the year, so, unfortunately, you and your home are always vulnerable. The fungus can cause health issues for you and your family, including allergic reactions, asthma and skin irritations, so it’s important to remove mold before it gets to be severe.
Can you clean mold?
With the right tools and precautionary measures, you can usually clean the surfaces where mold develops. Always wear a mask, goggles and gloves while cleaning to limit your exposure to the mold.
The first step for DIY mold removal is to dry the surface and vacuum any dust or debris. Then, scrub the mold off the surface with a bristle brush and mold cleaner, rinse and dry the area completely. For light surfaces, such as tile grout, you can use diluted chlorine bleach to remove the mold. According to The Maids, hydrogen peroxide, vinegar or baking soda are effective natural, non-toxic cleaners. However, if there is black mold, you may need to purchase a specific cleaner to disinfect the area. While these methods work for hard surfaces, keep in mind that absorbent materials with mold, such as ceiling tiles or outdoor seating cushions, should ideally be discarded and replaced.
How can you avoid mold?
Your cleaning efforts will go to waste if you don’t control the moisture in the area. To prevent mold from growing, start by identifying the source of the moisture, which could be leaks, condensation, humidity or poor ventilation. Once you know where the water is coming from, the key is to act quickly. According to the Environmental Protection Agency, you should fix plumbing leaks as soon as possible, and dry materials within a day or two of leaks or spills.
The EPA further recommends reducing the humidity levels in your home by 30 to 60 percent in order to decrease mold growth. To do so, make sure there is proper ventilation in all bathrooms, and take action by completing small steps like running the fan during and after your shower. Adding insulation to windows, doors, piping and floors can reduce condensation and improve the airflow inside your home. Dust also causes mold to grow, so make sure to clean your home regularly, focusing on baseboards, floorboards and air vents where dust is prone to build up quickly.
When should you call a professional?
When it’s ignored, mold can become excessive and cause health risks, so it’s never a bad idea to have your home inspected by a trained professional. Plus, while cleaning can be an effective temporary home mold removal solution, the mold may persist or you may experience plumbing or HVAC problems that only a professional can completely and safely repair.
Preparing for the future is the best line of defense when dealing with issues in and around your home. See how plans from Service Lines Warranties of American can help with the costs of home repairs.
Long showers feel great, but with every minute you spend pampering yourself, your wallet and the environment struggle. Along with saving money on your monthly bills, water conservation is critical for your community. According to the Environmental Protection Agency, it’s likely that at least 40 states will experience water shortages by 2024.
Follow these tips for how to save water at home:
1. Be mindful of running water.
Don’t keep the faucet running the entire time you’re brushing your teeth or washing your hands. You may have heard this one before, but it’s easy to lazily run the faucet instead of turning it off while scrubbing and then turning the tap back on when you’re ready to rinse. Similarly, avoid luxuriously long showers. Try to limit shower time to 10 to 15 minutes maximum to prevent wasting excess gallons of water.
2. Fix leaks as soon as possible.
Look out for leaky faucets, dripping water from shower heads, rusting pipes and signs of water damage.Locate the source of the leak, and fix it immediately to avoid wasting more water.
3. Don’t let the toilet run.
If you notice that your toilet is constantly running, try replacing the flapper. Simply shut off the water to the toilet, and flush to drain the tank. Unhook the old flapper from the base of the tank and chain, and then replace it with the new one. Turn the water back on, and you’re all set. If that doesn’t work, it may be time to buy a new toilet. Look for an energy-efficient model, and follow these steps to remove the old unit and install the new one.
4. Wash full loads only.
Make sure the dishwasher and washing machine are full before you run them. If you have a unit with energy-saving settings for light washes and smaller loads, take advantage of them. When it’s time to invest in a new machine, look for water-saving models with the settings that allow you to adjust to load size.
5. Use a compost bin.
An in-sink garbage disposal needs a lot of water to work efficiently, so opt for a compost bin instead. It’s healthier for the environment while reducing water waste and increasing the energy efficiency of your home.
6. Insulate pipes.
Be sure to insulate exposed pipes around the house, especially in the attic and basement. When they’re not insulated, it takes longer for water to heat up, meaning it’s running for longer periods of time. You can also cover the water heater with insulating blanket to further speed up the process.
7. Run the sprinklers in the morning.
The optimal time to water your lawn is early morning. This strategy prevents rapid evaporation from midday heat, which means less water is required to sufficiently cover the grass. Avoid rogue sprinklers wasting water by spraying the sidewalk or side of the house, instead positioning them to face the grass and landscaping appropriately.
8. Perform routine appliance maintenance.
Proper appliance care and upkeep can prevent potential leaks and wasted energy. This preventative maintenance includes regular cleaning and seeking professional advice when necessary. Plus, if it’s time for an upgrade, buy energy-saving products and appliances. According to the EPA, the average household can use about 20 percent less water with water-efficient fixtures and appliances.
Complement your water conservation at home with these ways to increase energy efficiency. With mindful changes, you can reduce your carbon footprint and save money each month.
If you notice spikes in your water bill, serious leaks or other maintenance issues during your water conservation efforts, don’t hesitate to call a professional.
See how plans from Service Lines Warranties of American can help with the costs of home repairs.
I grew up in a house with an outside deck. So I have many fond memories of sitting outside on warm, sunny days, reading and enjoying the view of my neighborhood. I would often open the sliding deck door to the adjacent living room while keeping the screen door shut so I could hear music from the living-room stereo without worrying about insects sneaking to the indoors.
So when that screen door started showing signs of wear and tear, my mom would complain how my brother and I were to blame (“too much rough housing” she would say) and “how in the world am I going to fix it?” What mom didn’t know is that while trying to patch a ripped screen door can seem difficult, it’s actually not so hard to fix.
We’ve compiled a list of common issues and helpful DIY remedies to make screen-door repairs a breeze:
Screen replacement 101
Because the screens in most screen doors consist of lightweight fiberglass, tears in the material are hardly unheard of, according to Popular Mechanics. Fortunately, they’re also easy and fairly inexpensive to replace. Your local hardware store will almost definitely have a replacement screen that fits your door. They’ll also have the specialized tool for dealing with spline – the rubber tubing that surrounds the perimeter of a screen and keeps it affixed to the door frame.
Let’s go step by step:
Remove the old screen by lifting it away from the track-mounted rollers. Pull the bottom of the material out and then lower the door until the screen clears the top edge of the frame.
From there, you can cut your own portion of screen material from a large roll, as HGTV noted, or purchase an a la carte pre-cut screen from your local hardware store.
Next, unscrew the door’s handle, then remove the segments of spline surrounding the door frame with an awl. (Don’t get rid of your spline if it doesn’t show signs of damage, as intact spline can be reused.
Use a screwdriver to remove the rollers and reattach either new or existing spline.
Align the replacement screen with the frame, using the spline tool’s convex and concave rollers to press the rubber tubing into the frame grooves.
Fit the screen snugly into the splined frame.
Finally, trim any excess fiberglass and reattach any parts of the door (latch, rollers, panel and so on) you might’ve removed.
Learn More About Home Repair Plans Near You
Dragging wheels and other irritations
If opening your sliding screen door is a chore – it moves slowly, creaks or doesn’t close all the way – it’s time to remedy that situation. (Especially if you want to avoid insect intruders.)
The culprit behind the dragging screen is frequently worn-down or broken wheels along either the top or bottom edge of the door’s frame, according to The Family Handyman. But just like a torn screen, this problem isn’t too hard to remedy – and neither are some other issues that may be at play.
Make sure the wheel track is clean and unobstructed.
Addressing a jammed track is even easier than a wheel replacement: just clear any debris or dirt from it. If the track is bent, straighten it with a pair of pliers.
Check the screws holding the wheels in place – if they’re too loose or too tight, adjust as necessary.
Don’t forget to check the sliding screen’s top row of wheels. Because of their location, they don’t experience as much wear and tear, but better to be safe than sorry.
If these steps don’t address the issue, you probably need to change the wheels. As with replacement screens, you can easily find spare screen-door wheels at most hardware stores. To start, remove the screen door from its tracks. From there, you can unscrew the old wheels, affix your replacements to the door and put the adjusted door back in place. Ideally, it should move smoothly from then on.
Worst-case scenario
A screen door that is damaged beyond repair will need to be completely replaced. You can call your local hardware store, handyman, or big box retailer to find a new screen door that works for you.
Being prepared for home repairs before they arise is always a good strategy. See how plans from Service Lines of America can help with the costs of covered repairs.
I’ll admit it, I never thought about the inner workings of my dishwasher until it started giving me issues, and I had to figure out why the dishes weren’t coming out clean. When someone asked me if I’d checked the “dishwasher air gap”, I had no idea what they were talking about. So, that prompted me to Google how dishwashers work. (I’m somewhat of a self-proclaimed expert now.)
What I learned is: Your dishwasher is connected to the same plumbing infrastructure as the rest of your kitchen, meaning it’s eerily close to the dirty drain water that flows down your sink. If there’s a clog in your drains, that dirty water could flow back up into your dishwasher, contaminating your kitchen’s sanitation haven. Lucky for you, the dishwasher air gap is there to prevent such an unfortunate event from plaguing your appliance.
So what is a dishwasher air gap anyway?
Usually fitted to an existing hole on the sink or countertop and covered with a decorative cap, a dishwasher air gap connects to hoses below the sink or countertop. One is the dishwasher drain hose and the other typically connects to the sink’s drain pipe or garbage disposal.
As the unit runs, the dishwasher pump pushes wastewater to the air gap so it can exit through the drain hoses. If there is a backup or build up in pressure, the air gap also pushes fresh air into the hoses to prevent dirty water to flow back into the dishwasher. The process is essential for preventing cross-contamination between pipes and backflow into the dishwasher.
Does your dishwasher have an air gap?
I know, after all this talk about dirty sink water, why wouldn’t you want to have a dishwasher air gap? Well, some building codes only require minimal ventilation systems, so if you can’t find an air gap in your kitchen, odds are your area doesn’t consider it a compulsory component. However, if you’re planning on installing a new dishwasher any time soon, be sure to check local building and plumbing codes to determine if you should be including an air gap.
Do you need to do anything with the air gap?
Your dishwasher air gap will generally get on with its business with little necessary maintenance. However, cleaning it regularly can prevent blockage issues. To do so, simply remove the cover and unscrew the plastic cap. DoItYourself.com recommended removing the air gap entirely so you can flush it with water and wipe away debris. While you have visibility to the hoses, check it for clogs. If you see any signs of trouble, you can remove them to rinse and dry. Once you get everything back in place, be sure to check for leaks during the next dishwasher cycle.
If you want to install an air gap for your existing dishwasher, you can purchase a kit and follow this step-by-step guide from SFGate Home Guides. Alternatively, a licensed plumber can easily handle the project.
Maintaining the air gap goes hand in hand with overall dishwasher upkeep. For instance, loading your dishwasher correctly and cutting down on excessive water use can boost the appliance’s efficiency. And while it may feel a tad counterintuitive, you should clean your entire dishwasher about once a month.
Being prepared for home repairs is always a good strategy. See how plans from Service Line Warranties of America can help with the costs of water sewer line repairs and replacements.
Maybe you have white calcium built up on your shower heads and around the drains. Perhaps you find that your skin is itchy and your hair is dry. These may be indicators that you have hard water, which can harm your appliances in the long run.
This May Also Interest You:Have Hard Water? Here’s How to Know — and How to Treat It
It may be time to consider investing in a water softener system. Use this guide to get an idea of how much that will cost.
How Much Does It Cost to Install a Water Softener?
The average cost of installing a new water softener system is $1,500 (CAD 1,880).
Prices for a water softener installation for the average home typically range from $500 to $6,000 (CAD 630 to CAD 7,500). The main factor of what it will cost is the size of the system you purchase. The average price for water softener installation in a larger home is $2,500 to $10,000 (CAD 3,100 to CAD 12,500). If you are handy, you may be able to cut costs by installing it yourself.
A water softener needs to be replenished with sea salt. The monthly cost of softener salt is $2 to $15 (CAD 2.50 to CAD 19).
How Much Does It Cost to Replace a Water Softener?
Most water softeners typically last around 10 to 15 years — provided they’re well maintained. When it comes time to replace your unit, you can expect an average cost between $700 and $930 (CAD 880 and CAD 1,200). This cost includes installation. Modern water softener systems may have certain parts tied to the sewer system. Because of this, you may need a permit and a professional who can install these systems to code.
What Are the Labor Costs Involved?
The average cost of installing a water softener is $500 to $6,000 (CAD 630 to CAD 7,500). The labor aspect of this average is $100 to $500 (CAD 125 to CAD 630). The labor cost for installing a water softener depends on a few factors:
The type and size purchased
How accessible the installation area is
If it requires extra piping materials or a drain
More Related Articles:
What Is a Water Softener?
Installing a Water Softener Isn’t So Hard: A 6-Step Guide
How to Know If Your Bathtub Has Hard Water
How Much Do Home Water Filtration Systems Cost?
Scrub-a-Dub-Dub: How to Clean Your Bathtub
What Size Water Softener Do I Need?
1. Determine the Hardness of the Water
One of the first things you should do to determine if you need to get a water filtration system is test your water hardness. The hardness of your water is based on what minerals are present in it. You can contact your water company, hire a professional lab or purchase a testing kit. The results are measured by grains per gallon (gpg) or milligrams per liter (mgL). The range for hard water is 7 to 11 gpg or 121 to 180 mgL.
2. Determine Your Water Consumption
Next, you need to determine the amount of water your household uses. Most household members use 80 to 100 gallons (300 to 400 liters) of water per day. Multiply your daily average by the number of people in your home. This number is your average daily consumption. For example, if you use 80 gallons (300 liters) per day and have three people in your home, your average daily consumption would be 240 gallons (900 liters).
3. Calculate Grains Removed
Calculate how many grains the system would need to remove weekly. Multiply the gpg of your water by your household daily consumption. If your water has a hardness of 9 gpg, and the daily usage is 240 gallons (900 liters), the number of grains that need to be removed each day is 2,160. Multiply your daily number by 7. This example has a weekly average of 15,120 GR.
4. Determine Water Softener Size
Water softener sizes are typically indicated by grains to be removed weekly. The most common sizes for water softeners start at 24,000 GR and go up to 64,000 GR. When choosing a size, allow for water use fluctuations in different seasons. For the household of 3 that needs 15,120 grains to be removed, a 24,000 GR softener would be suitable.
From the outside, your plumbing system might seem simple, but go a bit deeper, and you’ll find an intricate network of pipes and fixtures that can all have major issues. Because plumbing systems are often mysterious to homeowners, it’s no wonder certain myths have cropped up about their inner workings.
This May Also Interest You:How Do You Flush a Toilet Without Running Water?
Acting on common plumbing myths can make plumbing problems worse or introduce new issues that can damage fixtures, cause water damage or require expensive professional repairs. These are some of the biggest plumbing myths going around. Here’s how to avoid unintentionally damaging your plumbing system.
Steer Clear of These Plumbing Myths
These plumbing “tips” are often passed down through generations. Kids see their parents putting a brick in the toilet tank or pouring drain cleaner down the sink to clear clogs and assume it’s the best way to handle plumbing issues. The following plumbing myths are some of the most common ones people share.
1. Drain Cleaners Are Safe and Effective
It’s easy to assume that drain-cleaning products are safe and effective if they’re sold in stores, but they can actually be very dangerous. The harsh ingredients used in these drain openers are often damaging and can cause your pipes to deteriorate. If you breathe them in, splash them on your skin or get them in your eyes, they can cause serious injuries.
Drain cleaners don’t always work all that well, either. That might lead you to try other methods, such as additional drain-cleaning products, which can cause a serious chemical reaction if combined. If you use a plunger after putting drain opener in your drain, the plunger could splash the product on you. Instead, it’s best to try plungers and augers initially without the addition of drain-opening products.
2. Flushable Wipes Are Flushable
Despite the name, flushable wipes aren’t really safe to flush. Toilet paper is designed to break down, so it goes down the drain when you flush your toilet and doesn’t easily clog up the sewer or septic system. However, flushable wipes don’t disintegrate as toilet paper does, so they can often clog up the system. It might flush down your toilet, but it can create deeper issues in your system. Toilet paper and human waste are the only things you should flush.
3. Minor Leaks Are Nothing to Worry About
If your sink only has a minor drip, you might not think much of it. However, every drip adds up and can lead to gallons of wasted water. The leaky faucet will likely get worse, which can cause more damage and even more wasted water. Handling a plumbing leak as soon as you notice it prevents the issue from getting worse.
4. Lemon Peels Are Good for Garbage Disposals
There’s a good chance someone has told you to put lemon peels down your garbage disposal to freshen it up. Citrus peels can damage the disposal. Even though the chopped-up lemons might temporarily freshen your kitchen, they can make the blades dull. The citric acid can also cause the metal blades to corrode, and the peels can clog your garbage disposal. Instead, use a cleaner designed for garbage disposals, and always disconnect the power if you’re wiping the blades or other garbage disposal components.
More Related Articles:
Never Flush These 11 Things Down Your Toilet
5 Things You Should Know About Your Plumbing Vents
Got Plumbing Problems? Here’s What Plumbing Issues Homeowners Insurance Covers … and What It Doesn’t
Pipe Burst? Here’s What to Do Next
15 Common Plumbing Problems Every Homeowner Needs to Watch Out For
5. If It Goes Down the Drain, There’s Nothing to Worry About
For the most part, if your toilets flush and the drains drain well, your plumbing should be working fine. However, sometimes clogs can build up inside the pipes even when water is still flowing. Some clogs start small and gradually build up as more gunk goes down the drains, which means the problem could be growing in the pipes without you realizing it. If you notice the water starts to take longer to drain or you notice other unusual things, having your drains cleaned could help you avoid a major clog or backup.
6. Pipes Only Freeze If the Heat Is Off
You might think the only way your pipes can freeze is if you lose power or your furnace stops working. However, some pipes can freeze even if your heat is working fine. Pipes that run through exterior walls without much insulation or in areas like basements and attics that aren’t insulated can freeze, even if your furnace is still running. Freezing can often lead to a burst pipe, which can cause serious water damage. Monitor your pipes carefully in freezing weather. Leaving cabinet doors under sinks open and insulating pipes in uninsulated areas can minimize the risk of freezing.
7. Putting a Brick in the Toilet Tank Will Save Money
A brick in the toilet tank is supposed to save you money by using less water, but it can cause toilet issues. Your toilet tank needs a certain amount of water in it to flush the toilet properly. The brick can make the flushing worse by decreasing how much water the toilet has. The brick could break apart and cause issues inside your toilet.
8. Plumbing Is Easy to Fix Yourself
All homes eventually need plumbing repairs. It’s tempting to tackle them yourself to save money, but many repairs are better left to professional plumbers. DIY repairs could lead to bigger problems that cost a lot more to fix. Before trying to fix a plumbing issue yourself, ensure you’re fully equipped to make the repair.
9. Any Plumber Can Handle Your Issues
Some people believe that all plumbers are the same and can handle all plumbing issues. Most states require plumbers to be licensed, but they don’t all have the same credentials or training. Not all plumbers are equally reliable or knowledgeable on plumbing issues, so it’s important to check reviews and ratings to look for red flags.
If you have a very specific issue, it’s a good idea to find a plumber with extensive experience in that issue. For example, if your tankless water heater isn’t working properly, ensure you find a plumber who has worked on a lot of tankless water heaters and not just traditional tank types.
Our plumbing system is an essential part of your home, but many homeowners don’t understand how it works.
This May Also Interest You:Got Plumbing Problems? Here’s What Plumbing Issues Homeowners Insurance Covers … and What It Doesn’t
Knowing what the different plumbing system components do and how they function can help you diagnose and manage plumbing problems.
How Does a Plumbing System Work?
Your plumbing system consists of freshwater and wastewater subsystems. The freshwater subsystem pushes water through your pipes under enough pressure to supply upstairs fixtures. Meanwhile, the wastewater subsystem transports used water away from your home. Depending on your wastewater system, the water travels to a municipal sewer or a septic tank.
Plumbing systems also contain a water heater with a tank to store hot water and supply your fixtures. Alternatively, you may have a tankless system that heats water on demand.
How Does Fresh Water Enter Your Home?
Most American homes get their water supply from a public water supply system in their town or city. The entity responsible for the communal water supply uses powerful pumps to transport water from a well or body of water to a water tower, and the source depends on the natural geography of the area. Water suppliers then treat and filter the water to make it safe to drink.
Sometimes, the tower is located on high ground, allowing gravity to pull water along supply lines to people’s homes. Otherwise, the supplier pumps the water to supply local houses with water.
Some homeowners in remote communities have their own wells that supply their homes with fresh water. They may also have a tank as part of their plumbing system to store water so that it’s readily available.
How Does Fresh Water Flow to Fixtures Like Sinks and Showers?
After fresh water enters your home via a main water supply line, it’s pumped under pressure along supply pipes made from plastic, iron or copper. These pipes branch out to supply every fixture in your home, including toilets, faucets and showers. Some of the water supplies your water heater and travels along hot water supply pipes to your fixtures.
Pressure is essential for forcing water through your plumbing system. A pressurized system allows water to travel upward to supply upstairs taps and push around corners in your pipework.
More Related Articles:
5 Things You Should Know About Your Plumbing Vents
Condensation on Your Toilet? Don’t Sweat It
15 Common Plumbing Problems Every Homeowner Needs to Watch Out For
Pipe Burst? Here’s What to Do Next
How Do You Flush a Toilet Without Running Water
What Are the Major Parts of a Home Plumbing System?
Your home’s plumbing system has three major parts:
Pipes: Supply hot and cold fresh water to your fixtures
Fixtures: Allow access to hot and cold fresh water
Drains: Carry wastewater from your fixtures to the sewage system
Each part of your plumbing system requires proper installation and maintenance to keep everything working correctly. A professional plumber can advise you on how to care for your plumbing system.
What Are Plumbing Vents?
Plumbing vents, also known as vent stacks or plumbing air vents, control the airflow through your plumbing system. These vents are vertical pipes that attach to a drain line and allow waste gases to escape while supplying fresh air to your plumbing system.
Plumbing vents prevent a vacuum from forming inside your plumbing system, allowing water to flow freely to your fixtures. They also stop sewer gases from entering your home by carrying them to the main roof vent away from your home’s ventilation system.
How Is Wastewater Taken Out of the Home?
Unlike your freshwater system, your drainage system isn’t pressurized. When you flush the toilet or let the water run down the plughole, gravity transports it downward through the fixture drain. Fixture drainpipes usually have curved sections called traps that prevent waste gases from traveling back up the pipe and into your home.
Fixture drains connect to horizontal branch drain lines concealed in the walls. These horizontal lines have a slight downward angle to allow the water to flow into soil stacks, which are large vertical pipes that connect to the main drain. The main drain is usually located underneath your house.
The main drain line is angled downward to encourage wastewater and solid waste toward the municipal sewer main or septic field. The municipal sewer main is a communal line owned by your city or county that transports the sewage to a wastewater treatment plant. Some municipal sewer lines transport water using gravity alone, but others use pumps to push wastewater through the system.
If you live in a rural area where it would be too expensive or impractical to install a public sewer system, you may have a septic tank. These tanks are large concrete or steel containers installed underground in the yard. Sewage flows through the main drain line into the septic tank, where solids sink to the bottom to form sludge and floating waste rises to the top. This creates a layer of clear wastewater in the middle. As more water enters the tank, some of the existing water flows into perforated pipes in a drain field where it seeps into the ground.
No one thinks about their bathtub drain. In fact, unless it’s clogged, you probably never do. But things happen. And sometimes your bathtub drain needs a little more care than a simple unclogging.
This May Also Interest You:4 Ways to Unclog a Bathtub Drain
If that’s the case, you’re probably left with two questions: Can you even replace the drain in a bathtub, and how much will that cost? We’ve got your answers.
Can You Replace the Drain in a Bathtub?
The good news is that, thankfully, a bathtub drain can be replaced. The process can be done either by a professional or as a do-it-yourself project. Usually, it’s a relatively straightforward process. Some drains can be easily replaced within a few minutes. Be aware, though, that others will require extensive plumbing work beyond that of a simple drain replacement. How involved the process is will likely be determined by the type of bathtub you have and the reasons you want or need to replace the drain.
Why Replace a Bathtub Drain?
There are many reasons people will need to replace the bathtub drain. It could be that you’ve tried every method you can think of to clear a clog and you’re still having issues. It might be that you’ve got a cast iron tub, and a drain that doesn’t work could lead to rust issues. Perhaps you have a fiberglass tub, and the drain is causing residue buildup. Any of these reasons — or a whole host of others — could lead you to want to replace your drain. Replacing your drain is also a step to take before going through the work required to replace the whole bathtub.
More Related Articles:
How to Remove a Bathtub Drain
How to Install or Replace a Bathtub Drain
How to Install or Replace a Shower Drain
Here’s How to Remove a Shower Drain
How to Retrieve Your Wedding Rind From the Sink Drain
What’s the Average Cost to Replace a Bathtub Drain?
Typically, the cost for the drain itself is somewhere around $100. However, you might be able to do it for less. The price of parts and labor associated with the cost to replace a bathtub drain vary based on a few factors. The two biggest will be the kind of bathtub you have and the type of work it needs. Free-standing tubs, for example, will require a completely different drain-replacement technique than a walk-in unit. Plus, if you’re just replacing the main drain interface of the tub, it will be much cheaper than if you need to hire a plumber to replace the bathtub P-trap.
If you go the DIY route, labor costs are zero, putting the total around $100 because you’re just paying for parts. Meanwhile, the cost to hire a professional to change out your bathtub drain will come in somewhere around $350. Keep in mind this price is just for the drain replacement, and it doesn’t include other bathtub drainpipe costs. The more the job extends into the plumbing beyond the drain area, the more it will cost.
One of the most important maintenance tasks you can do for your water heater is to flush it. Sediment like calcium and other minerals can build up inside the tank over time, causing it to erode, which shortens its lifespan. To deal with this problem, you need to flush it to get rid of these pesky minerals and other unwanted debris.
This May Also Interest You:What’s the Difference Between Tank and Tankless Water Heaters?
Whether you hire a professional or do it yourself, flushing your tankless water heater is something you need to add to your list of yearly maintenance tasks. By doing so, you can improve your water heater’s efficiency and delay an expensive water heater replacement down the road.
Why You Need to Flush Your Tankless Water Heater
Mineral sediment made up of calcium and magnesium can build up inside your water heater over time and disrupt efficiency as well as reduce its lifespan. Mineral buildup can also cause loud, unpleasant noises to come from the water heater. When you flush a water heater, the cleaning agent used helps remove this buildup in the process and restores the machine.
Water heaters aren’t cheap by any means, so by performing routine maintenance like flushing them, you’ll help increase your machine’s longevity.
How Often Do You Need to Flush Water Heaters?
You should strive to flush your water heater at least once a year at the minimum. This will keep things running smoothly and ensure it doesn’t need replacement before its time. If the area you live in has hard water, you’ll want to flush it even more often.
DIY or Hire a Professional?
With the right tools and knowledge, you can certainly flush a tankless water heater by yourself. In fact, there are water heater flushing kits you can buy online for the job, which come with everything you need. They include things like a circulation pump, hoses, a bucket and a cleaning agent.
However, this is not a project where you can put caution aside. If you’re not confident working with tools, it’s best to leave it up to a professional. Depending on where you live, you can expect to pay anywhere between $150 to $250 per flush. Assuming you only do it once a year, the yearly costs of flushing are minimal compared to the costs of replacing a water heater. So, in the end, it’s a good long-term investment.
More Related Articles:
How to Install a Tankless Electric Water Heater: A 10-Step Guide
A Tankless Job? Decide Whether a Tankless Water Heater Works for Your Home
How Much Does It Cost for a Tankless Water Heater?
How to Turn Off Your Water Heater — and When It May Come Up
Thinking About a Solar Water Heater? Here Are the Pros and Cons
How to Flush a Tankless Water Heater: Step By Step
Step 1: Turn Off the Isolation Valves and Gas
The first step is to turn off the isolation water valves that connect to your water heater — a blue inlet valve for the cold water and a red outlet valve for the hot water. A valve is turned off when it’s perpendicular to the pipe. If the valve is in the same direction as the pipe, then the valve is turned on. Always double-check that the valves are closed. You also need to turn off the gas valve by following the same steps above. You don’t need to turn off the power to your water heater.
Step 2: Connect the Hoses
Connect the hoses to the inlet and outlet valves. There might be a service port cap on both valves you need to remove before connecting them. If you didn’t buy a flushing kit that already comes with water hoses, you could always use water machine hoses as well. Connect the hoses to the vales and use pliers to ensure that the hose and valve are watertight. You don’t want the water to start leaking when you’re in the middle of flushing.
Step 3: Attach Hoses to the Circulation Pump
Now you need to use the circulation pump that came with your water heater flushing kit. Attach the other end of the inlet hose to the circulation pump and place it in the bucket. You only need to attach the inlet hose to the discharge side of the pump. For the outlet hose, you can simply place it in a bucket since the system you have set up will ensure the cleaner goes through the structure and cleans off any magnesium and calcium.
Step 4: Add Cleaning Agent
Once your system is all set up, simply add the cleaning agent to the bucket. The bucket should have at least one gallon of water in it before beginning the process.
Quick tip: If you don’t have a cleaning agent, you can always use vinegar. However, you will need to use at least 2 to 3 gallons of vinegar and let it circulate longer.
Step 5: Open the Valves
At this point, you just need to open up the water valves to let water flow through them and start the pump. You need to let everything circulate for at least 45 minutes and up to an hour and a half. The instruction booklet that comes with the cleaning agent will tell you how long you should let things circulate, but plan on at least an hour. If you’re using vinegar, you need to let it run even longer — for at least an hour and a half to 2 hours.
Step 6: Flush Out the Cleaning Agent
After the time has passed, turn off the pump to stop the circulation. Then turn off both valves and disconnect the inlet valve hose. You now want to flush out any remaining cleaning agent or vinegar. To do this, keep the hose connected to the hot water outlet valve and turn on the cold water inlet valve. This will push water up the system and flush out everything through the hose on the hot water side. Let the water flush for 5 to 10 minutes, then turn off the service port and the cold water inlet valve again. Finally, simply remove the remaining hose.
Step 7: Reconnect Everything
The tankless water heater has now been flushed, so now you can put everything back the way it was. Plug the service port caps back in and then turn on both water valves and the gas valve.
Is your toilet acting up? From toilet handle issues to clogs, a lot can go wrong with the busiest seat in the house. One of those things is the toilet fill valve, which controls the water that goes from the tank to the bowl. When you flush the toilet, it opens to let the water in the bowl. Then, it closes to refill the tank.
This May Also Interest You:Taking Out a Toilet? Be Sure to Drain It First
When this valve fails, you’ll need to know how to fix a toilet fill valve to get your toilet back on track. Here’s what to do.
What Causes a Toilet Valve to Fail?
One of the most common causes of a failing toilet valve is simple wear and tear. The more times you flush, the more wear that happens to the toilet valve. This can cause the fill valve to move out of alignment or otherwise experience problems.
These toilet valves can also become dirty or clogged when debris builds up inside of them. The inner components are often inaccessible, which means it’s difficult impossible to clean out the debris.
How to Know When to Replace a Toilet Fill Valve
All homeowners should know basic toilet maintenance — like when to replace or fix a toilet fill valve. In addition to spraying water, here are some signs that you need a new toilet valve:
Constantly running toilet
Strange noises, such as low humming or screeching
Tank takes a long time to refill
Weak flushing
Can a Toilet Fill Valve Be Repaired?
When the toilet fill valve fails, you usually need to replace the whole thing. A new fill valve is inexpensive. Plus, you get the peace of mind of knowing that everything is news and less likely to fail again soon.
That said, you can make some adjustments to your fill valve that could help. For example, if the toilet doesn’t fill to the appropriate level, there’s an adjustment on the fill valve that you can move up or down. You can also adjust the height of the fill valve if needed.
How Do You Repair a Toilet Fill Valve?
The easiest way to fix a toilet fill valve is to simply replace it. Sometimes, you can remove and clean the existing fill valve to correct the issue. But usually, the answer you want when you ask how to fix a toilet fill valve is to install a new one. If the valve is very worn, it’s probably best to replace the entire thing to prevent more problems. You’ll often spend more on wasted water than you would to buy a replacement valve.
How Do You Replace a Toilet Fill Valve?
If your toilet fill valve fails, you usually need to replace it completely. These steps should guide you in the process:
1. Shut off the water supply to the toilet. The shut-off valve is usually behind the toilet tank.
2. Flush the toilet to empty the tank. You might need to use a sponge or towel to soak up the remaining water in the tank to keep it from spilling on your floor.
3. Position a bucket on the floor underneath where the water supply line connects with the toilet. This catches any leftover water that you can’t remove from the tank, which will leak out as soon as you remove the old fill valve.
4. Disconnect the water supply line at the base of the toilet tank.
5. Unscrew the locknut on the toilet fill valve and remove it from the tank.
6. Position the new fill valve inside the toilet tank, referring to the package instructions if necessary. The tube on the valve goes into the discharge. There might be a clip to attach the hose as well, depending on the replacement valve you buy. The fill valve is adjustable. The overflow pipe in your toilet should be 1 inch (2.5 centimeters) below the critical level mark on the flush valve for things to work correctly.
7. Adjust the fill valve if necessary to get the correct height. You might need to cut off the top portion of the overflow pipe if you’ve extended the fill valve as much as possible, but the overflow pipe is still too tall.
8. Hand-tighten the locknut once you get the proper positioning of the toilet fill valve. You want it tight enough to keep the valve in place without overtightening and breaking it.
9. Reconnect the water line and turn the water supply on.
10. Test the toilet to make sure it flushes and refills correctly without leaking. You can adjust the water level inside the tank by squeezing the metal clip and sliding it up or down along the metal rod.
More Related Articles:
Condensation on Your Toilet? Don’t Sweat It
How to Fix Your Toilet Handle in 6 Simple Steps
What’ll a New Toilet Do to Your Bottom Line? Here’s What It Costs
Time to Swap Seats? Here’s How to Install or Replace a Toilet Seat
Never Flush These 11 Things Down Your Toilet
What Type of Fill Valve Do I Need?
When you’re buying a replacement part, you might notice different styles of fill valves at the store. Some older models use a ball float to measure the water level and determine when to shut off the water. A more modern design is the float cup fill valve, which has a round float mounted around the shaft. The float goes up and down with the water level and determines when the water level is high enough. You can also get floatless fill valves that use a pressure-sensing diaphragm to control the water.
Tips on How to Fix a Toilet Fill Valve
Use these tips to help when replacing or fixing a toilet fill valve.
Try adjusting your current toilet fill valve first to see if that resolves the issues.
Keep a bucket under the water connection point until the replacement is completely done and you’re sure it’s not leaking.
Grab an old towel in case you need to dry up spilled water. Place the old fill valve on the towel to keep any water from leaking out of it.
Avoid using a wrench or pliers to tighten parts so you don’t break them.
If you notice a leak from your water heater or your water supply is cut off, it’s important to act quickly to avoid damage to your heater unit or surrounding walls and floors. Typically, this means turning off your water heater.
This May Also Interest You:Does My Homeowners Insurance Cover My Water Heater?
Knowing in advance how to turn off your water heater can give you the confidence that you know what to do in a plumbing emergency. Here’s a quick guide.
Is It OK to Turn Off a Water Heater?
It’s generally best to avoid turning your water heater off too regularly. Some homeowners try to save money by switching off their water heaters when they don’t need them, but the savings are unlikely to be significant enough to justify the additional wear and tear on your machine.
Furthermore, you’ll have to wait for around an hour for the water heater to produce enough hot water for a bath or shower after you turn it back on, which is bad news if you’re in a rush and don’t leave enough time. Switching your water heater on also puts it under extra stress, which could cause it to malfunction if you do it again and again. However, there are some situations when you’ll need to turn your water heater off.
When and Why Should You Turn Off a Water Heater?
There are a couple of situations when you should consider turning your water heater off. If your main water supply is turned off for any reason, it’s best to shut down the water heater as a precaution until the supply resumes. Continuing to run your water heater when the tank isn’t full could cause heat damage to the internal components.
The other time you should always turn off a water heater is if it starts leaking. This is a sign of a faulty valve or could indicate that your heater is simply too old and needs replacing. A water leak from your heater could cause damage to your walls or floors, so turn it off until you can get support from a professional plumber. You’ll also need to turn off an electric water heater before you flush it.
How Do I Shut Off My Gas Water Heater?
First, locate the temperature dial on your gas water heater and twist it into the off position. Look around the top of the water heater to find the supply line and switch off the valve to stop any more water from flowing into the heater.
Next, you need to switch off the gas supply to the heater. If you have a lever, turn it so that it’s perpendicular to the supply line. If you have a knob, twist it clockwise until it won’t go any further. Finally, turn the air relief valve off to let air inside the tank.
How Do I Shut Off My Electric Water Heater?
Start by finding the breaker box for your home’s electricity supply and turn off the line to your water heater. You can usually find the breaker box on an external wall. If you plan on flushing your water heater, now is a good time. Turn off the water supply valve, then switch off the air supply valve to allow the tank to fill with air.
More Related Articles:
Tired of Tepid? Here’s How to Turn Up the Temp on Your Water Heater
How to Install or Replace a Gas Water Heater
Your Guide to Draining a Water Heater
How to Test a Water Heater Element
How Much Does It Cost to Repair or Replace Your Water Heater?
Can I Turn Off the Water and Leave My Water Heater On?
If you need to turn your water off for any reason, it’s always safer to turn your water heater off, too. While many water heaters will be fine for a while without a water supply, reduced water pressure or a low water level inside the tank could cause the heater’s components to overheat and burn. This could cause significant, expensive damage to your water heater.
How Do I Know If My Water Heater Is Off?
If you’re concerned that you haven’t turned your water heater off correctly, try turning on a faucet for a couple of minutes to ensure that the water runs cold. You can also try listening to the heater to check that it’s silent. While a water heater should be reasonably quiet if it’s in good working order, most make a low noise that will alert you if it’s still running.
Having an organized shower is crucial to making your showering experience smooth and relaxing. There are many types of shower organizers, and choosing the right one depends on different factors. Apart from functionality, shower organization also affects the aesthetic of your bathroom and impacts how much space you have.
This May Also Interest You:Here’s How to Hack Your Low-Flow Showerhead … But Should You?
Since you spend a considerable amount of time each day in the shower, you want to design the area in the most effective way to save time and space. If you think shelving is the only way to get organized, you’d be wrong. There are other effective shower storage solutions that might be more convenient for you.
Can You Store Things in a Shower Without Shelving?
Shelving is often one of the most common solutions for organizing a shower. However, there are many other types of shower organization techniques that don’t require shelving. While shelving certainly has its benefits, it also takes up valuable space unless it’s already built-in. Other options can also make organizing more simple.
Organizers, Hooks, Caddies and More
Here are eight different shower storage solutions for your bathroom. Each one is suitable for different showers and organization goals, so you can choose the one that best suits your needs.
1. Built-In Shower Shelves
There are many showers out there that already have pre-existing, built-in wall shelves. These are typically large enough to hold your shampoos and soaps. In terms of space, they’re one of the most efficient solutions. Organization-wise, though, they aren’t the best, and if you have several items, it can quickly get messy or chaotic if something falls. If you’re remodeling your bathroom and getting a new shower, it’s worth considering built-in shelves if space is a big priority.
2. Corner Shelves
Corner shelves can be a great addition to a shower because you can easily store items while bringing some style to the shower. They are easy to install and can hold shower products like face wash, face scrub, razors, shaving cream and more. They don’t take up too much space, either. There are many designs for corner shelves and sizes, too. You can choose among glass, granite, ceramic and more. There are even shower caddy-style options.
3. Shower Caddies
After shelves, shower caddies are probably the second most commonly used shower organizers. Shower caddies are convenient if you live in a place where you share a shower with other people.
Michelle Hansen, a professional organizer who runs Practical Perfection, says caddies make it easy to corral all of your own items, and they don’t get mixed up with other people’s stuff. It also helps to designate a spot for all of your items so that it stays looking nice and organized.
There are many types of shower caddies, so it’s easy to find one that matches the style and size of your shower.
4. Shower Hooks
If you’re looking for ways to organize things like shower sponges or a squeegee, you can use something as simple as shower hooks. Shower hooks are a great addition to bathrooms and showers, offering a convenient way to place things to hang off the walls. By having a place for each individual item, you can keep things clutter-free.
Another way you can use shower hooks is by hooking up a laundry basket on them. Then instead of adding one item, you can fit a whole bunch of things in the laundry basket. It’s not nearly as elegant as other storage methods, but it’s certainly efficient.
More Related Articles:
9 Ways to Recreate the Spa Experience in Your Bathroom
How Do You Install a Shower? Follow This Guide
Pay Attention to That Mold Behind the Curtain! A Shower-Curtain Cleaning How-To
How to Replace a Showerhead
Hot Water Ran Out While You’re In the Shower? 5 Reasons You’re Freezin’
5. Floating Shower Bench
Floating shower benches are growing in popularity because they add more than just storage. Convenience is another significant factor. You can place items on the bench or below the bench, knowing you won’t accidentally knock them over.
Apart from that, benches also make other things you do in the shower more manageable, like shaving your legs. It also makes for a great experience if you just want to sit and relax while the water falls on you. There are many designs available, and you can use different materials like marble, granite or quartz to match the bathroom design.
6. Soap and Shampoo Dispensers
Showers can quickly get cluttered up with shampoo, conditioner and body wash bottles. Hansen suggests you can easily get rid of that clutter and have a perfectly organized shower by using a dispenser. Plus, using a dispenser cuts down on product waste — especially when you have kids. With a dispenser, only a certain amount of each product gets released each push.
However, you should choose carefully when buying a shampoo dispenser. Some of them might have little durability and can fall off the wall after a while, causing a mess.
7. Shower Baskets
A shower basket is another simple way of organizing the shower without taking up too much space. Shower baskets can be added to the corners or right by the shower walls. You have a wide range of choices when it comes to sizes as well. Some shower baskets will come with suction cups to attach them to tiles, but others require drilling. To eliminate this need, you can use a popular solution like Sugru Moldable Glue to hold it up instead.
8. Hanging Mesh Organizer
A hanging mesh organizer connects to your shower curtain tension rod. Depending on the one you buy, it will have several pockets where you can place things like shampoo, body wash, razors and bath sponges. Since they just kind of hang from the rod, they don’t take up any additional space like other shower organizers. They’re also pretty easy to set up, so they don’t require a tricky installation.
What’s the Best Shower Organizer?
Among all the types of shower organizers, which one is the best one? Well, there’s no exact answer to that. As mentioned, each shower organizer has its pros and cons. Even better: You can use two types of shower organizers at the same time. You can have corner shelves while also using shower caddies or product dispensers.
In the end, it comes down to how you want to style your shower and the space you have available. If you just want something simple and effective and you don’t care too much about how it looks, then shower hooks or hanging mesh organizers are a perfect choice. For something more stylish, you can equip the shower with corner shelves, shower caddies or built-in shelves.
As a homeowner, you should always be on the lookout for things that can cause damage to your home — and your bank balance. One of the things you should be on the lookout for when the mercury drops is frozen pipes. A frozen waterline can, unfortunately, be all too common among homeowners and can lead to the need for thousands of dollars in repairs.
This May Also Interest You:9 Ways To Winterize Your Home
We’ll take you through some questions you should be asking yourself, and provide helpful answers to make you aware of problems to be on the lookout for and preventive measures you can take to avoid frozen-pipe problems.
How Long Does It Take for Pipes to Freeze?
Your waterlines — especially those located outdoors — are prone to freezing during cold temperatures. There’s no definitive time it takes for pipes to freeze — but be assured that, in extremely cold weather, it won’t take very long. It may seem counterintuitive, but houses in warmer climates are usually more susceptible to frozen pipes than houses in colder climates because the latter group typically have construction measures to guard against such issues.
Insulation and where your pipes are situated are probably the biggest factors in determining how long it might take the lines to freeze.
How Cold Does It Have to Get for Pipes to Freeze?
Many homeowners believe that, because water freezes when the air temperature reaches 32 degrees Fahrenheit that their pipes are in danger as soon as the thermometer dips to that number. Well, you may breathe a sigh of relief to learn that’s not the case.
You need to be concerned about your faucets when the weatherman forecasts temperatures of 20 degrees or less. At that point, how well-insulated your pipes are will dictate whether your pipes are sufficiently protected. With a reasonable amount of insulation, even pipes in an unheated area could take as long as six hours to freeze. On the other hand, if you have little or no insulation, your pipes could freeze in as little as three hours.
What Are the Risks of a Frozen Waterline?
Not only are frozen pipes a huge nuisance that can cause you headaches and your water systems problems, it can also cost you lots of money. When a frozen pipe bursts, which can happen if left unchecked, water damage is all but inevitable. It could cost you tens of thousands of dollars to repair the damage left behind.
That’s why it’s vital to call a professional plumber at the first sign of a frozen pipe. If a pipe does burst, it can be tempting to try to remove anything in the water’s path, but for safety’s sake it’s best to wait until help arrives, as standing water can hide sharp debris and tripping hazards. The water can also be extremely cold, and if there are electrical outlets or appliances touching the water, there’s a risk of electrocution.
Signs of a Frozen Pipe?
There are several warning signs of frozen pipes or frozen faucets. Unfortunately, to the untrained eye, some of these signs can be difficult to spot.
Here are some red flags to be on the lookout for:
Temperatures. As we previously mentioned, it has to reach a 20 degrees for your pipes to freeze, so once the mercury drops below 32 degrees, that’s the time to take precautions.
Frost on the pipe. If your pipes are visible, you may be able to see frost accumulating.
No water is coming out of the faucet. A lack of running water can be another telltale sign.
Strange smells. Odd odors could mean that your pipe is partially or completely blocked, possibly due to freezing, as the only direction for the stench to escape is back toward your property.
What To Do If Your Waterline Freezes?
Once you’re aware that a pipe is frozen, you must act quickly to thaw it. Depending on the location of the pipe and your level of expertise, you can attempt to thaw the pipe yourself or you can contact a licensed plumber to do the job for you. In any case, it’s imperative to thaw the pipe as soon as possible because it has the potential to burst and cause extensive damage to your property.
Can You Fix a Frozen Faucet Yourself?
If you consider yourself a handy person or you’re interested in trying a DIY project to prevent thousands of dollars in repairs, you can try to address frozen pipes yourself. Keep in mind, it can be difficult to pinpoint the frozen pipes.
Here are some of the steps necessary to thaw out your frozen pipes:
Locate the frozen pipe. If the blockage is in an area of your home that you have access to, you should look for signs of a freeze.
Open the faucet. In order to thaw out the pipe, you’ll need to open the faucet that the waterline feeds into.
Begin the thawing process. You should always begin near the faucet, then work your way toward the blockage, which ensures that any melted ice can make its way through the open faucet.
Thaw the exposed pipes. You can use a hairdryer, heat lamp, hot towels or electrical heating tape.
Thaw enclosed pipes. For pipes you can’t see, you can try to thaw them out by increasing the temperature of your home, using an infrared lamp or cutting out a section of your wall for direct access.
If you aren’t confident in your ability to thaw out the pipes yourself, contact a professional for assistance.
How Can You Keep Pipes From Freezing?
The best way to avoid paying thousands of dollars to repair damage caused by frozen pipes is to avoid the problem in the first place. Here are some proactive steps you can take:
Keep your house adequately heated
Allow faucets to drip slightly
Keep interior doors open
Seal up holes and cracks
Add insulation, which as an added benefit helps keep your house warmer in general
Remove exterior hoses
Do External Faucets Have an Indoor Shutoff Valve?
Whether your external faucet has an indoor shutoff valve will largely depend on where you live. If you live somewhere in the North, for example, where it gets very cold in the winter, it’s common to have a valve somewhere in the house. In warmer climates, it’s not uncommon for there to be no indoor valve.
When winterizing your house for the season, you should turn the indoor valve off and leave the outside one open so the water can drip out. The danger is that trapped water could freeze and burst the pipe. The valve will likely be either very near to where the pipe feeding the exterior fixture exits the house, or where the pipe splits from the main trunk line.
What Should You Do When the Outside Faucet Is on and Water Leaks into the Basement?
This type of issue is not uncommon in homes that have hoses that are connected to a water source located in the basement. If water gets backed up into your basement, the first thing you should do is reach out to an expert — and the sooner the better, as a large buildup of water can lead to extensive structural damage.
There are steps that you can take to prevent this from happening in the future. For example, you should drain your faucet before every winter to ensure your pipes remain clear of potential frost. If you don’t drain the water in advance, or it leaks and then the temperature drops sufficiently, it could split the outer pipe, which might then leak when you open the faucet.
Should I Install an Insulated Faucet Cover?
We brace for the cold weather to take its toll on us when the winter months come around — but an unexpected temperature drop might not leave you enough time to take preventive measures. It doesn’t take long for a snap of icy temperatures to cause the water in your spigot or indoor pipes to freeze.
By installing an insulated faucet cover, you can protect your home from unexpected freezes. Now, that’s not to say that you shouldn’t make the proper arrangements ahead of the colder months, but insulating your outdoor faucets with a Styrofoam cover can buy you some time when Old Man Winter sneaks up on you.
If you are dealing with frozen pipes, or you want to take steps to prevent frozen pipes, call the team here at Service Line Warranties of America to learn more about the packages we offer.
Since we’re all home now more than ever, being prepared for unexpected home repairs with a plan from Service Line Warranties of America is important. Having a plan in place gives you the peace of mind knowing that you can simply call our 24/7 repair hotline for covered breakdowns. See what plans are available in your neighborhood.
You hop into the shower and quickly jump back out again because the steaming water you were promised is nowhere to be found. If that’s the case, it may be time for a new hot water system. And as long as you’re in the market for one, consider a solar water heater.
This May Also Interest You:How Much Does It Cost to Install Solar Panels?
If you don’t know much about them, you may be hesitant to get a solar-powered water heater. (How much do they cost? How well do they work if the sun’s not shining?) But solar hot water systems can offer plenty of benefits to homeowners. You may find that buying one is a worthwhile investment for your home. Here’s what you need to know.
What’s a Solar Water Heater?
At their most basic, solar heating systems act as greenhouses for water. The technology isn’t new; the first system was patented in 1891. Systems have improved since then, and today, they use a set of solar panels — known as a solar collector — that trap heat. This heats the water, which is then stored.
When deciding on a solar hot water system, you can choose between an active system and a passive system. The main difference is that active systems have a circulating pump and controls. Passive systems tend to be less efficient, but they are less expensive and often last longer. An installer can help you determine which type works best for your home, water needs and location.
Is a Solar Water Heater Worth It?
The answer to this question is always going to depend on your individual circumstances, but most people find a solar water heating system is a good investment. If you’re trying to build a more eco-friendly lifestyle, solar water is a great addition to your home as it decreases your carbon footprint.
Even those not interested in going green for the environment find that a solar system helps give them more green financially by putting more money in their pocket. Although upfront costs can be high, these systems pay for themselves over time by reducing your energy bills.
However, solar hot water systems aren’t without their disadvantages. Your potential savings can differ depending on where you’re located, and some homeowners have to pay additional costs to prepare their homes for the systems. It’s important to understand both the pros and cons of installing solar hot water before deciding if it’s right for you.
What Are the Benefits of Solar Hot Water?
Cost Savings
The U.S. Department of Energy estimates that 19% of a household’s energy use goes toward heating water. In most homes, it accounts for the second-largest energy expenditure behind space heating. But once you have solar hot water installed, it doesn’t cost anything to heat the water because using the sun is free. The exact amount you can expect to save depends on a number of factors, such as how much hot water you use and where you live. However, the says that the average U.S. household saves 50% to 80% on their water heating bills after installing a solar hot water system. You’ll also be protected if there are fuel shortages or rising energy costs in the future.
Increased Home Value
Homes with green features are becoming increasingly popular, so solar hot water can help your resale value. It’s likely solar hot water will add value to your home when you’re ready to sell as buyers continue to look for energy-saving and environmentally friendly housing options.
Tax Credits
Currently, homeowners can get a federal government tax credit for the cost of materials and installation of a solar hot water system. The credit is 26% for systems installed before the end of 2022, which can help offset the initial cost of the system. Keep in mind that some states have additional credits available that can lower the cost of the system even further. The credit is only available for systems that heat water in your home, not those used to heat pools or hot tubs.
Environmentally Friendly
Solar hot water systems have a gas or electric backup system for overcast days, but most of your hot water is heated using 100% renewable energy. This means you’re lowering your household’s carbon footprint and keeping greenhouse gases out of the atmosphere.
More Related Articles:
How to Install Solar Panels: 6 Steps to Daylight Savings
What’s It Like to Go Solar? 5 Things They Don’t Tell You in the Brochure
Gimme a Tax Break: 5 Things to Know to Get the Latest HVAC Tax Credits and Rebates
What Are Solar Shingles … and Do They Work?
Does My Homeowners Insurance Cover My Water Heater?
What Are the Disadvantages of a Solar Water Heater?
Upfront Costs
HowMuch.net says the average cost of installing a solar hot water system is $4,120, but exact prices depend on the type of system and where you live. According to HomeServe data, replacing your old water heater with a regular, tanked model costs $1,741 on average.
There’s definitely a premium for installing solar. However, tax credits can help lower the costs. And according to Energy Star, solar hot water systems often last longer than traditional systems, so you can delay the cost of a replacement system.
Roof Space
Solar hot water panels are much smaller than solar electricity panels because they’re more efficient at converting sunlight to heat. Despite this, you do need room on your roof for the system. That space needs to be oriented in the right direction and can’t be covered by shade from trees or taller buildings. As the systems can be heavy, they may not be suitable for older houses. Or, you may need to reinforce the roof so it can hold the weight.
With all these considerations, you may find it hard to find an appropriate space for a solar water system. Installers are generally happy to visit your property to determine if a system will work for you.
Less Efficiency on Cloudy Days
Solar panels can generate heat on cloudy days, but you may find the system is less efficient in certain types of weather. This is especially true in northern states that get less sunshine during winter. The majority of systems have boosters that provide hot water when the sun isn’t up to the challenge, so you don’t need to worry about cold showers. However, you may have fewer financial benefits if you live in an area that lacks sunny days.
Maintenance Costs
All hot water systems need to be maintained, whether you’re flushing the system or checking the valves. However, solar systems can be more difficult to maintain yourself due to the nature of the parts. It can also be harder to find someone to do maintenance than it would be if you had a traditional system. You should keep these future costs in mind when making your decision.

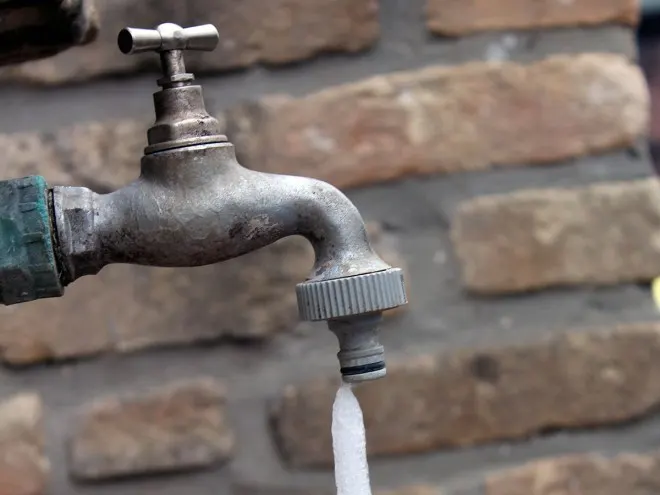
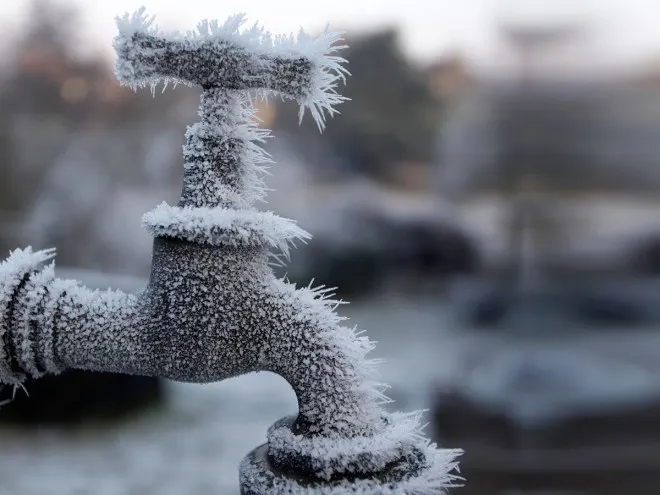
You must be logged in to post a comment.